How to Add B-Roll, Images and Video Clips to a Video in VidCarve
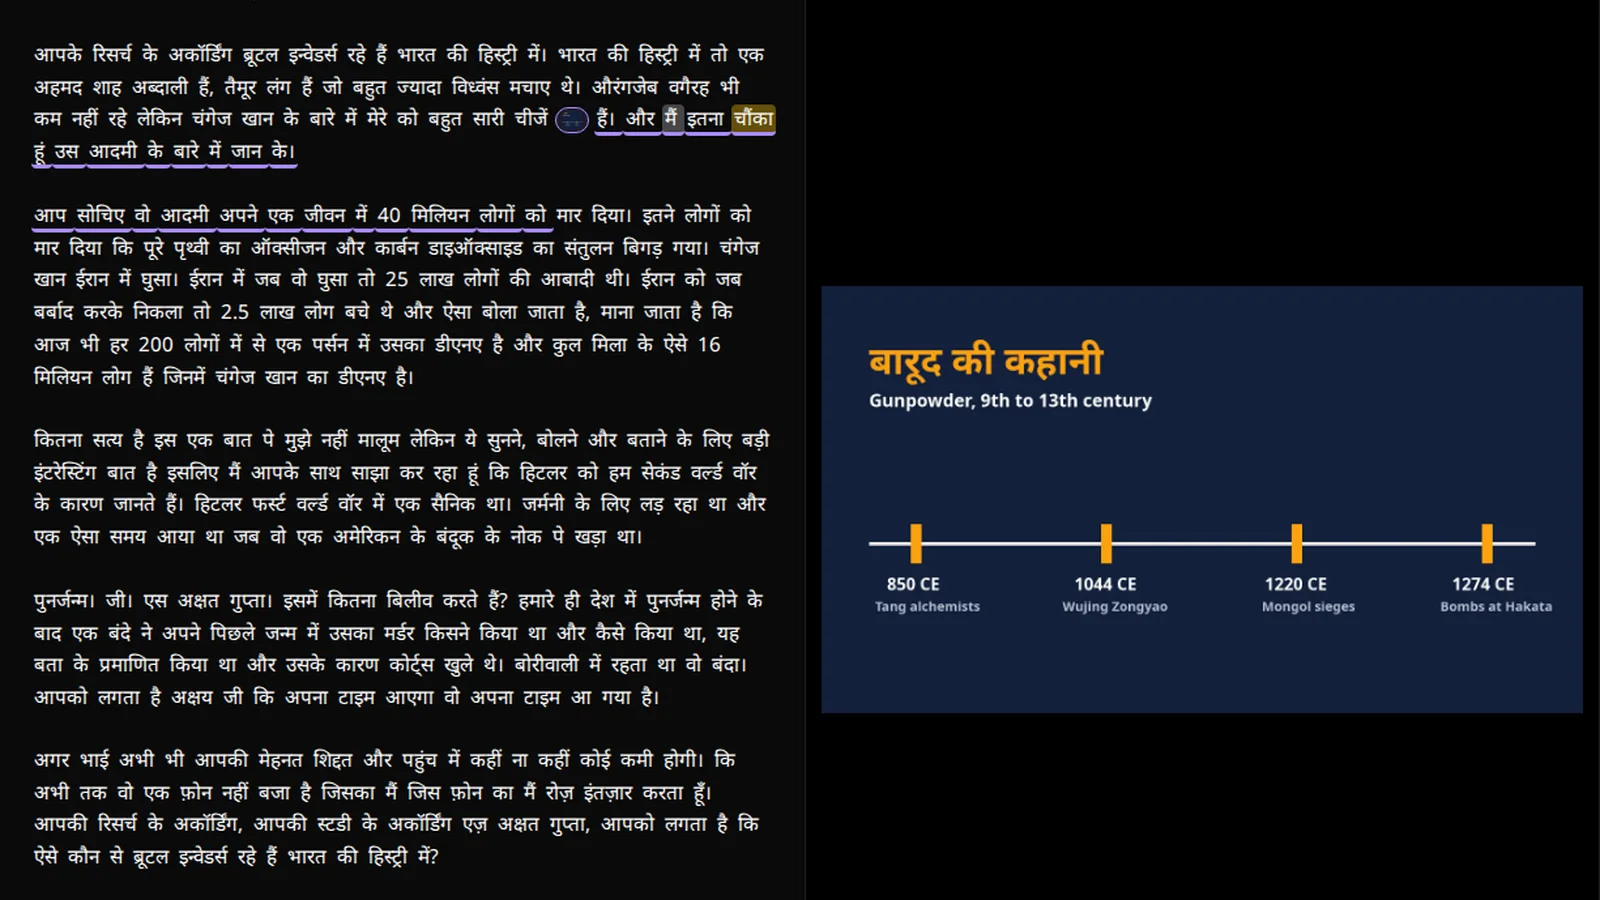
To add B-roll in VidCarve, select the words you want it to play over, choose Add image or video…, and pick a file. The picture or clip shows while those words are spoken — full-frame or as a picture-in-picture — and the transcript draws a coloured media line under the words so you can see exactly where it starts and ends. There is no timeline to drag it along; the words are the timeline.
This guide covers placing media, the controls in the chip menu, how a clip's sound is mixed under your voice, and the handful of things the layer deliberately does not do yet.
The short version
- Select a run of words in the transcript — click the first, shift-click the last, or drag across them.
- Choose Add image or video… from the small toolbar that appears.
- Pick a file from this project's media, or upload one — JPEG, PNG or WebP up to 20 MB, or an MP4, MOV or WebM clip up to 300 MB and two minutes long.
- Click the chip that appears at the first word to switch between Full frame and Picture-in-picture, set the corner and size, and adjust the volume.
- Play from just before the words to check it, then export as usual.
What does "B-roll" mean in a transcript editor?
In a conventional editor, B-roll is a second video track you lay over the main one and trim by eye. VidCarve has no tracks, so the same idea is expressed the only way a transcript can express it: a picture attached to a span of words. The span's start and end are word boundaries; the media's timing is derived from those words every time the video plays or exports.
That has a useful consequence. If you later cut words inside the span — a filler pass, a tightened pause, a deleted sentence — the picture stays attached to the words that survive and simply gets shorter. You never re-time B-roll after a cut.
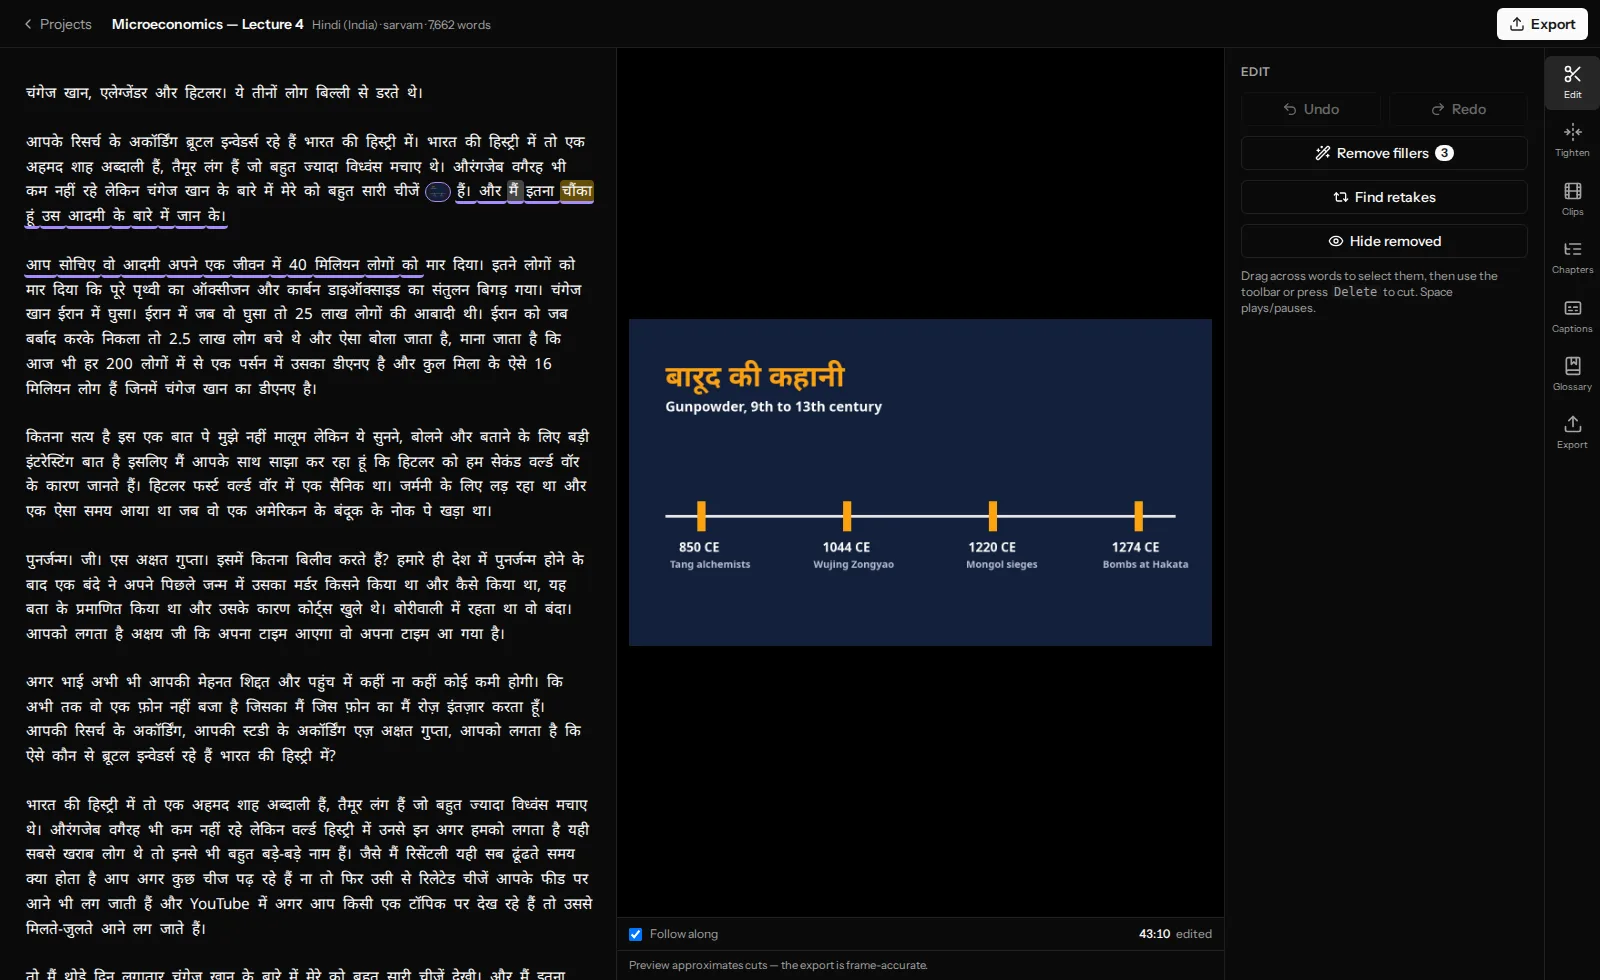
Step 1: Select the words and add media
Select the words the picture should cover. The toolbar that appears has the usual Delete and, below it, Add image or video…. Choosing it opens a picker with two tabs:
- This project's media — every file you have already uploaded to this project, with a thumbnail. Click one to place it.
- Upload — drop a file or browse for one. A single file placed on a single selection is attached the moment its upload finishes; you do not have to find it in the library afterwards.
Uploads go straight from your browser to storage, the same way your main video does, and then a short processing step makes a browser-sized preview and the little thumbnail for the chip. While that runs the chip shows a spinner and the placement is already in the transcript; you can keep editing. It takes seconds for an image and up to a minute for a two-minute clip.
Each project can hold 25 media files. A file that is placed somewhere cannot be deleted from the library until you remove that placement — the trash icon on it tells you so.
Step 2: The chip menu
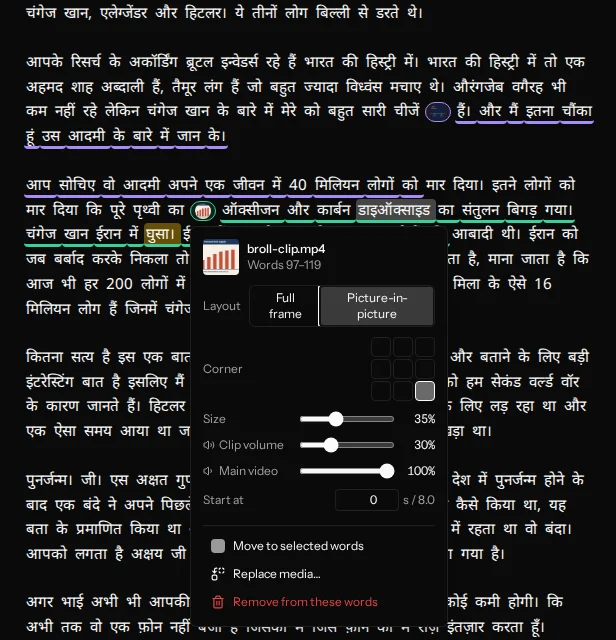
The chip sits at the first word of the span and shows the file's thumbnail. Click it for the controls. The first line tells you which words it covers (Words 61–85 in the screenshot above), which is how you confirm you selected what you meant to.
Layout
- Full frame replaces the picture entirely. Fit chooses between Fill — scale to cover the frame, cropping the edges — and Fit — show the whole picture with black bars. Use Fill for photos and Fit for slides, screenshots and anything with text near the edge.
- Picture-in-picture keeps you on screen and puts the media in a corner. Corner is a three-by-three grid, so the middle of any edge and the centre are also available. Size is a fraction of the frame height, 35% by default, from 10% to 80% — it reads the same at 720p and 1080p and in both aspects.
Sound, for clips
A clip's own audio is mixed under your voice, not swapped in for it. Clip volume sets how loud the clip is (30% by default — B-roll sound is texture, not content). Main video sets how loud you are while the clip is on screen, 100% by default; turn it down when the clip's sound is the point, say a few seconds of the street you are describing.
In the export, the clip is also ducked automatically whenever you speak — it dips under your words and comes back up in your pauses. The editor preview plays the clip at the volume you set but does not simulate the ducking, so the export will sound a little cleaner than the preview.
Start at trims the front of the clip: enter 3 and playback begins three seconds in. The field shows the clip's length beside it.
Move, replace, remove
- Move to selected words — select a different run of words first, then choose this to re-anchor the same media there.
- Replace media… — swap the file, keeping the words and the layout.
- Remove from these words — take the placement off. The file stays in the project's library.
How long does the media play?
Exactly as long as the words take. An image simply holds for the span. A clip that is shorter than the span plays through and then holds its last frame; a clip that is longer is cut off when the last word ends. If you want a longer clip to show a particular part, use Start at rather than trying to select more words.
Cuts inside the span do not restart the clip. If you have removed a sentence in the middle of a placement, the clip carries on from where it would have been, so the export looks continuous over the jump — which is, after all, what B-roll is for. There is more on that in making jump cuts look intentional.
What is drawn on top of what?
From the bottom up: your video, then the media, then burned-in captions, then the free-plan watermark if you are on the free plan. Captions therefore stay readable over a full-frame picture — worth knowing if you use slides, because a caption bar will sit across the bottom of them. Moving the captions up in the caption style fixes that.
Things the layer does not do (yet)
- Placements cannot overlap. One picture at a time. Selecting words that already carry media disables Add image or video… — click the existing chip to change it instead.
- B-roll is not in Undo. Cuts are versioned and Undo walks that history; media placements live beside it and are changed only through the chip menu. Removing a placement is one click, so this rarely matters, but do not expect Cmd/Ctrl-Z to bring one back.
- Re-transcribing removes placements. A placement is anchored to word positions in a specific transcript. If you Transcribe again after adding glossary terms, the placements are cleared and the uploads stay in the library to be placed again. Add your glossary terms before your B-roll, not after.
- No GIFs, no HEIC. Convert a GIF to MP4 and a HEIC photo to JPEG first. Phone photos that arrive sideways were saved with a rotation flag rather than rotated pixels — rotate them in any photo app before uploading.
- Vertical clips. Clips exported at 9:16 include the media, but the vertical preview in the Clips tab draws it with the 16:9 geometry; check the exported file rather than the preview for a picture-in-picture corner.
Frequently asked questions
Is B-roll available on the free plan?
Yes, on every plan. The limits — 25 files per project, 20 MB images, 300 MB and two-minute clips — are the same everywhere.
Can I use a video clip without its sound?
Set Clip volume to 0. A clip that has no audio track at all is also fine; the sound controls just have nothing to do.
What happens to B-roll if I delete all the words under it?
The placement has nothing left to attach to and exports nothing. Restore the words, or move the media to a different selection.
Can I put the same image in two places?
Yes — upload once, then place it from This project's media on a second selection. The library counts the file once.
Do B-roll files count against retention?
They are removed on the same clock as your source video, since without the source the project cannot export anyway. Exports you have already made are kept. See how retention works.
Next steps
- What B-roll is for, and how much to use — the editorial side of the same feature.
- Edit a recorded lecture — where slides as picture-in-picture earn their keep.
- Remove filler words, silences and retakes — the cuts B-roll usually covers.